When the lights go out and the world goes quiet, your Troy-Bilt generator stands ready to bring power back. It's a lifeline, a comfort, and a testament to modern convenience. But like any vital piece of machinery, it needs a little TLC to perform at its peak. Mastering Troy-Bilt Generator Maintenance & Troubleshooting isn't just about avoiding a breakdown; it’s about ensuring reliability when you need it most, giving you peace of mind that your home, campsite, or job site will never be truly powerless.
This isn't just a manual; it’s your tactical guide to keeping that steady hum of power going, from the essential oil change to diagnosing a stubborn no-start issue.
At a Glance: Your Generator's Best Friends
- Regular Oil Changes: Every 50 hours or seasonally, using the right type.
- Clean Filters: Air and fuel filters need seasonal checks and cleaning/replacement.
- Spark Plug Care: Inspect every 100 hours; clean or replace as needed.
- Fresh Fuel Only: Old fuel is the enemy of reliability. Use stabilizers.
- Battery Check-ups: Test, clean terminals, and replace a weak battery.
- Tight Connections: Periodically inspect all electrical and fuel line connections.
- Owner’s Manual: Your primary source for model-specific guidance.
Why Your Troy-Bilt Deserves Top-Notch Care
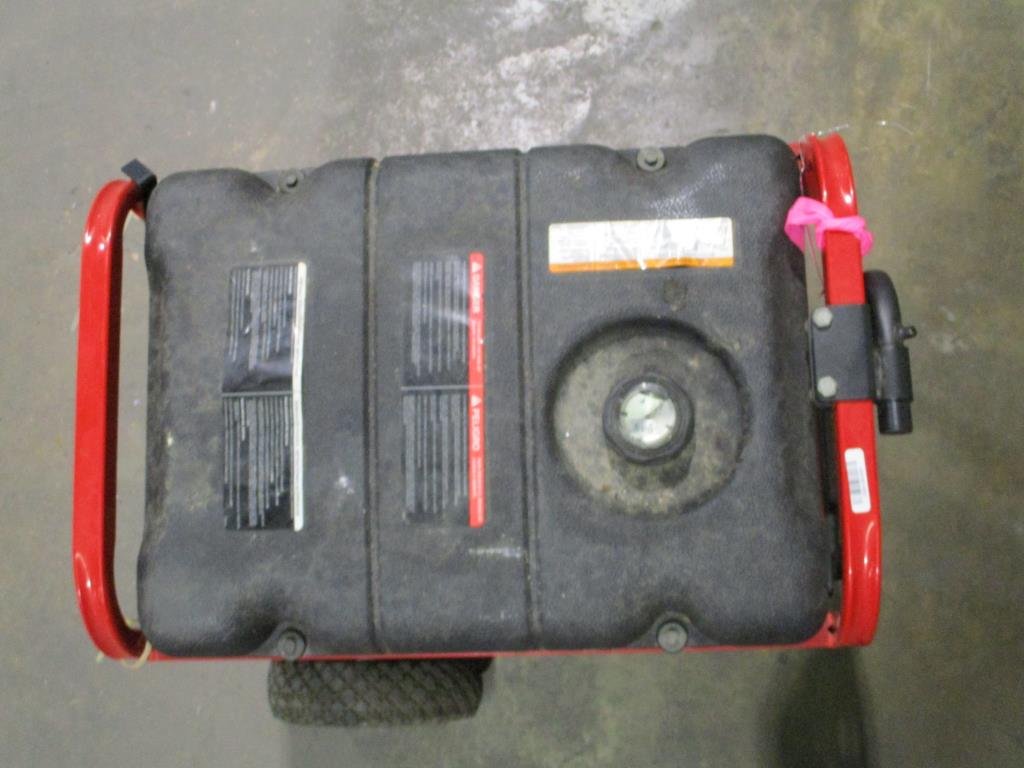
Troy-Bilt generators are well-known for their robust construction and dependable performance, often serving as the silent heroes during power outages. Whether you rely on a compact portable generator for those camping trips or tailgates, have a standby generator wired directly into your home for seamless automatic power during a blackout, or use a quiet inverter generator to safely power sensitive electronics, proper care is paramount. These machines, whether running on gasoline, propane, or as a dual-fuel setup, boast specific wattage ratings and convenient features like wheels and handles, all designed to deliver power efficiently.
Think of it this way: your generator is an investment in uninterrupted living. Neglecting it is like buying a fire extinguisher and never checking its pressure gauge. When an emergency strikes, you want assurance, not anxiety. A well-maintained Troy-Bilt generator ensures you get maximum uptime and extend its lifespan, protecting your investment for years to come. For a deeper dive into choosing the right model, check out our comprehensive Troy-Bilt generator guide.
The Golden Rules of Generator Care: Preventative Maintenance
The secret to a reliable generator isn't a complex ritual; it's consistent, routine care. Following a simple maintenance schedule can prevent the vast majority of common issues before they even start.
1. Keep the Lifeblood Flowing: Oil Changes
Your generator’s engine oil is like its blood, crucial for lubrication, cooling, and cleaning. Dirty or old oil can lead to excessive wear and premature engine failure.
- When to Change: Aim for an oil change every 50 hours of operation or at least once per season, whichever comes first. If your generator sits unused for extended periods, a seasonal change is still wise as oil can degrade over time.
- What to Use: Always refer to your owner's manual for the recommended oil type and weight. Using the correct oil ensures optimal performance and engine protection across various temperatures.
- How to Do It: With the engine warm (but not hot), place a drain pan beneath the drain plug. Remove the plug, allow all oil to drain, then replace the plug. Refill with the recommended fresh oil to the proper level indicated on the dipstick. Don't overfill!
2. Breathe Easy: Air Filter Care
A clean air filter is essential for proper combustion. A clogged filter chokes the engine, leading to reduced performance, increased fuel consumption, and potential damage.
- Inspect Regularly: At the beginning of each season or after heavy use in dusty conditions, remove and inspect the air filter.
- Clean or Replace: If it's merely dusty, you can often clean it by tapping it gently or using compressed air (blowing from the inside out). If the filter is visibly dirty, torn, or saturated with oil, replace it with a new one.
3. Sparking Performance: Inspecting the Spark Plug
The spark plug is responsible for igniting the air-fuel mixture. A fouled, worn, or incorrectly gapped plug can cause misfires, rough running, and starting difficulties.
- Scheduled Check: Inspect the spark plug every 100 hours of operation.
- What to Look For: Remove the plug and check the electrode for signs of fouling (carbon buildup), pitting, or excessive wear.
- Clean or Replace: If fouled, carefully clean it with a wire brush. Check the gap against your manual's specifications using a feeler gauge and adjust if necessary. If it's significantly worn or damaged, replace it.
4. Fuel System Vigilance: Fresh is Best
The fuel system is often the source of many generator headaches. Stale or contaminated fuel can wreak havoc on carburetors and fuel lines.
- Fresh Fuel Only: Always use fresh gasoline, preferably no older than 30 days. Ethanol-blended fuels can absorb water and degrade rapidly, causing corrosion and gunk buildup.
- Fuel Stabilizer: If you store your generator for more than a month, always use a high-quality fuel stabilizer to prevent degradation and keep the system clean.
- Inspect for Leaks: Regularly check all fuel lines, connections, and the fuel tank for any signs of leaks, cracks, or damage. Address them immediately.
- Filter Check: Your generator likely has a small fuel filter. Inspect it for blockages and replace it if it looks dirty or clogged.
5. Tighten Up: Electrical Connections
Loose or corroded electrical connections can lead to intermittent power output, starting issues, or even complete failure.
- Periodic Check: Every few months, visually inspect all accessible electrical connections, especially those around the engine, outlets, and control panel.
- Tighten and Clean: Ensure all wires are securely attached. If you see corrosion, particularly on battery terminals, clean it off thoroughly.
6. Battery Health: Powering the Start
For electric-start models, a strong battery is non-negotiable. A weak battery can leave you stranded when you need power most.
- Test Regularly: Every few months, test the battery's voltage with a multimeter. A fully charged 12-volt battery should read around 12.6 volts or higher.
- Clean Terminals: Keep battery terminals clean and free of corrosion. A mixture of baking soda and water can effectively clean away acidic buildup.
- Replace if Weak: If the battery struggles to hold a charge or tests consistently low, it's time for a replacement.
7. Your Ultimate Guide: The Owner's Manual
No advice online can replace the specific information found in your Troy-Bilt generator's owner's manual. It contains precise recommendations for oil types, maintenance schedules, torque settings, and troubleshooting steps unique to your model. Always defer to it for definitive guidance.
When Things Go Sideways: Common Troubleshooting Scenarios
Even with meticulous maintenance, issues can arise. Knowing how to diagnose common problems can save you time, money, and frustration. Here's how to tackle the most frequent Troy-Bilt generator repair problems.
No Power? Let's Get It Back On
This is perhaps the most frustrating issue: the generator runs, but the outlets are dead. Here’s a systematic approach to get the current flowing again:
1. Check Your Fuel Supply (Again!):
- Adequate Level? Simple but often overlooked. Is there enough fuel in the tank? Refill if low.
- Correct Fuel Type? Using diesel in a gasoline generator (or vice-versa) or old/contaminated fuel will prevent power output. Confirm you're using the fuel specified in your manual.
- Fuel Quality: Is the fuel older than 30 days? Old fuel can lose its volatility and cause issues. Drain it and replace it with fresh, stabilized fuel.
- Fuel Blockages: Inspect the fuel lines and fuel filter for any clogs or kinks. A dirty fuel filter can restrict flow. Clean or replace as needed.
2. Inspect Electrical Connections & Safeguards: - Loose Wires: Examine all electrical connections, especially those leading to the outlets and circuit breakers, for tightness. Wiggle them gently to see if they're loose; tighten any you find.
- Tripped Circuit Breakers: Your generator has its own circuit breakers (similar to your home's electrical panel). Check if any have tripped, usually indicated by a switch in the "off" or "tripped" position. Reset them.
- Outlets: Inspect the generator's outlets for dirt, damage, or wear. Sometimes, a faulty outlet is the culprit. You can test outlets using a multimeter to confirm they're delivering power. Replace any damaged outlets.
- Overloaded Circuits: Are you trying to power too many appliances at once? Your generator has a maximum wattage output. If you exceed it, the breakers will trip to protect the unit. Disconnect some items and try resetting the breakers.
- Battery Voltage (Electric Start): For electric start models, use a multimeter to test the battery voltage. A low battery might affect the control panel or voltage regulator.
- Corroded Battery Terminals: Clean any corrosion from battery terminals using a baking soda and water solution.
- Weak/Dead Battery: If the battery is weak and won't hold a charge, it needs to be replaced.
Why Won't It Start?
A generator that cranks but doesn't fire up is a common headache. It usually boils down to issues with fuel, spark, or air.
- No Fuel/Stale Fuel: Check the tank. Is the fuel valve open? Is the fuel fresh? Old, gunked-up fuel is a primary culprit.
- Clogged Fuel Filter/Line: A dirty fuel filter or blocked line prevents fuel from reaching the carburetor.
- Spark Plug Issues: A dirty, fouled, or improperly gapped spark plug won't create the necessary spark. Inspect and clean/replace it.
- Low Oil Shutdown: Many generators have a low-oil sensor that prevents starting to protect the engine. Check your oil level and top it off if necessary.
- Choke Setting: Is the choke set correctly for a cold start? Too much or too little choke can prevent starting.
- Air Filter Blockage: A severely clogged air filter can starve the engine of air.
- Weak Battery (Electric Start): The starter motor might crank, but if the battery is too weak, it might not provide enough power for the ignition system to fully engage.
- Loose Connections: Check for loose spark plug wires or other critical electrical connections.
Running Rough: Smooth It Out
If your generator starts but sounds like it's struggling – sputtering, surging, or vibrating excessively – it's often a fuel or ignition issue.
- Stale Fuel/Contaminated Fuel: This is the most common cause. Old fuel leaves deposits that clog the carburetor jets, leading to inconsistent fuel delivery.
- Clogged Air Filter: A restricted air supply forces the engine to run "rich," causing it to run rough.
- Dirty Spark Plug: A partially fouled spark plug can cause misfires and uneven running.
- Carburetor Issues: Beyond just stale fuel, the carburetor itself might be dirty, have clogged jets, or require adjustment. This might necessitate a professional cleaning or rebuild.
Won't Stay Running? Here's Why
Your generator starts fine, runs for a bit, then dies. This often points to an intermittent fuel or safety cutoff issue.
- Low Oil Shutdown: The most common reason. If the oil level drops below the safe threshold during operation, the generator will shut down to prevent damage. Check and top off the oil.
- Fuel Delivery Problems: Similar to "running rough," intermittent fuel flow due to a partially clogged fuel filter, kinked line, or a failing fuel pump can cause the engine to starve and shut off.
- Overload: If the generator is consistently overloaded, its circuit breakers will trip, or the engine might bog down and die. Disconnect some appliances and ensure you're within the generator's wattage capacity.
The Dreaded Dead Battery
For electric-start models, a dead battery means a manual pull-start (if available) or no start at all.
- Battery Not Charging: Check the generator's charging system (if applicable). Fuses or wiring related to battery charging can fail.
- Corroded Terminals: Heavy corrosion on battery terminals can prevent current flow. Clean them thoroughly.
- Age/Internal Failure: Batteries have a finite lifespan. If it's old and doesn't hold a charge after cleaning and attempting to recharge, it’s likely time for a replacement. Test with a multimeter to confirm it's not holding voltage.
Leaking Gas? Stop It Safely
A fuel leak is a serious safety hazard. Address it immediately. Disconnect the spark plug wire before inspecting!
- Loose Fuel Line Clamps: Over time, clamps can loosen, allowing fuel to seep out. Tighten them.
- Cracked or Damaged Fuel Lines: Rubber fuel lines can crack, become brittle, or get cut. Inspect them thoroughly and replace any damaged sections.
- Fuel Filter Housing: If the fuel filter isn't properly sealed or is damaged, it can leak.
- Carburetor Float Bowl Gasket: A common leak point on the carburetor. The gasket can degrade, allowing fuel to seep out. This requires carburetor disassembly.
- Fuel Tank Damage: Punctures, cracks, or loose fittings on the fuel tank itself are serious issues that require professional repair or tank replacement.
- Petcock/Fuel Valve Leak: The fuel shut-off valve can develop leaks around its seals.
- Drain Plug/Seal: If the carburetor has a drain plug for emptying the float bowl, ensure it's tight and its seal is intact.
- Improper Storage: Storing the generator with fuel in the tank for long periods, especially ethanol blends, can corrode components and lead to leaks. Always run the carburetor dry or use a stabilizer.
When to Call a Pro: Knowing Your Limits
While many common issues are DIY-friendly, some problems are best left to a certified technician. Don't hesitate to seek professional help if:
- You're Uncomfortable: If any repair feels beyond your skill level or makes you nervous, stop.
- Complex Internal Repairs: Issues requiring extensive engine disassembly (e.g., valve adjustments, complete carburetor rebuilds beyond a simple cleaning, or engine block issues).
- Electrical System Faults: If you've checked breakers and connections but suspect deeper electrical problems within the generator's wiring or alternator.
- Gas Leaks You Can't Fix: If you can't readily identify and fix a fuel leak, a professional should handle it due to the inherent fire hazard.
- Persistent Issues: If you've tried all troubleshooting steps and the problem persists, an expert can perform a more in-depth diagnostic.
Your Power Playbook: Staying Ready
Your Troy-Bilt generator is more than just a machine; it's a critical component of your preparedness plan. By embracing a proactive approach to maintenance and understanding basic troubleshooting, you ensure it's always ready to spring to life when darkness falls.
Remember, a little consistent care goes a long way. Regularly check your oil, keep filters clean, use fresh fuel, and don't neglect the battery. These simple steps will significantly reduce the likelihood of a breakdown and maximize your generator's reliability and lifespan. Be prepared, be powered, and rest easy knowing your Troy-Bilt generator is ready for whatever comes next.